
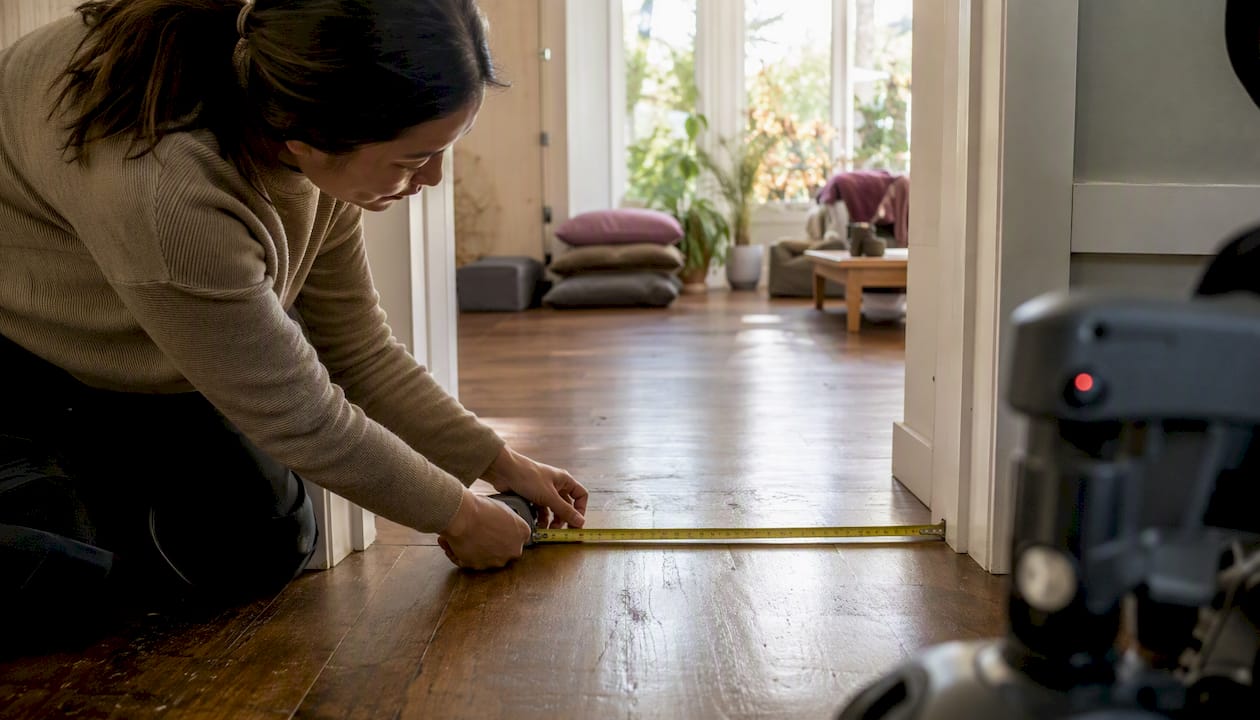
Clear and measure the full path from your front door to the room where the equipment will go, then call your supplier to confirm the delivery window. Do those two things today, and you have already avoided the most common delivery-day problems.
Here is what to complete in the next 24 hours:
- Measure every doorway, hallway, and 90° turn along the delivery route. Standard post-1990 doors typically range around 32 to 36 inches wide; a hospital bed or large wheelchair requires sufficient clear width to pivot through a turn safely.
- Call or message your supplier to confirm the exact delivery window, parking access, and whether the team will assemble the equipment in the room.
- Clear the path completely: move rugs, small furniture, and any cords from the front door to the destination room.
Pro Tip: Tape a piece of cardboard cut to the width of the equipment across each doorway before delivery day. If it drags, you need to remove the door from its hinges or rethink the route.
A patient safety checklist covering before, during, and after care is a practical tool to keep the whole process accountable from the moment the truck pulls up.
Key takeaways
Preparing for a medical equipment delivery comes down to three things: accurate measurements, clear communication with your supplier, and a safe, obstacle-free path from the front door to the room.
| Point | Details |
|---|---|
| Measure the full route | Check every door, hallway, and turn; standard doors run 32–36 in., and large equipment needs ~42 in. to pivot. |
| Confirm delivery details | Call ahead to verify the window, parking access, and whether white-glove setup is included. |
| Clear and secure the path | Remove rugs, cords, and furniture; confirm a grounded outlet is within reach of the equipment. |
| Document on arrival | Photograph the equipment and get a signed checklist before the technician leaves. |
| Book with Seventhchakra | Same-day wheelchair, scooter, and hospital bed rentals in Metro Vancouver with no deposit required. |
Table of Contents
- How to prepare for equipment delivery: measure the space first
- Get the person and caregivers ready before the equipment arrives
- Make the home safe for equipment and daily use
- What to expect from the delivery team and what paperwork to have ready
- Quick operation and safety checks to run with the delivery technician
- Quick fixes and who to call if something goes wrong after delivery
- Understand rental rules, pickup, and common fees before delivery
- Sanitisation best practices and infection-prevention steps
- One-page pre-delivery checklist
- A note from Seventh Chakra on same-day delivery and safety
- Seventhchakra’s same-day rentals for wheelchairs, scooters, and hospital beds
- Sources
- FAQ
How to prepare for equipment delivery: measure the space first
Getting the measurements wrong is the single most expensive mistake families make. A wheelchair or scooter that cannot clear a hallway turn means the delivery team leaves it at the door, and you lose a day.
Walk the full route yourself: front entry, entry hall, any 90° turns, the bedroom or living room door, and the space inside the room. Write each measurement down.
Hospital beds are designed to be disassembled for delivery, so a tight hallway is not always a dealbreaker. Tell the delivery team the narrowest measurement and let them plan the carry-in.
For caregiver working space, leave sufficient clearance on the transfer side of a bed or chair to allow safe standing, pivoting, and assistance. That is the minimum a caregiver needs to stand, pivot, and assist safely.
Pro Tip: If a 90° turn is borderline, remove the door from its hinges. It adds 1.5–2 inches instantly and costs nothing.
Tell the delivery team in advance about parking restrictions, elevator key fobs, building reception hours, and any loading zone time limits. A five-minute call saves a 30-minute delay on arrival.
Get the person and caregivers ready before the equipment arrives
The equipment showing up is only half the event. The other half is the first transfer, and that is where injuries happen when nobody has thought it through.
Patient readiness checklist:
- Wear loose, non-slip clothing and footwear with grip.
- Have all medications taken and accessible before the team arrives.
- Keep existing mobility aids (walker, cane) within reach during the transition.
- Identify a comfortable waiting spot away from the delivery path.
Caregiver roles: for a hospital bed, plan for at least two people during the first transfer. One supports the patient; the other manages the bed controls. For a wheelchair or scooter, one trained caregiver is usually enough, but a second person nearby is worth having for the first attempt.
Before the equipment arrives, rehearse the transfer technique verbally. Decide where each person stands, which side the caregiver approaches from, and whether you need a gait belt or slide sheet. Mark the caregiver’s standing position on the floor with a piece of tape if it helps.
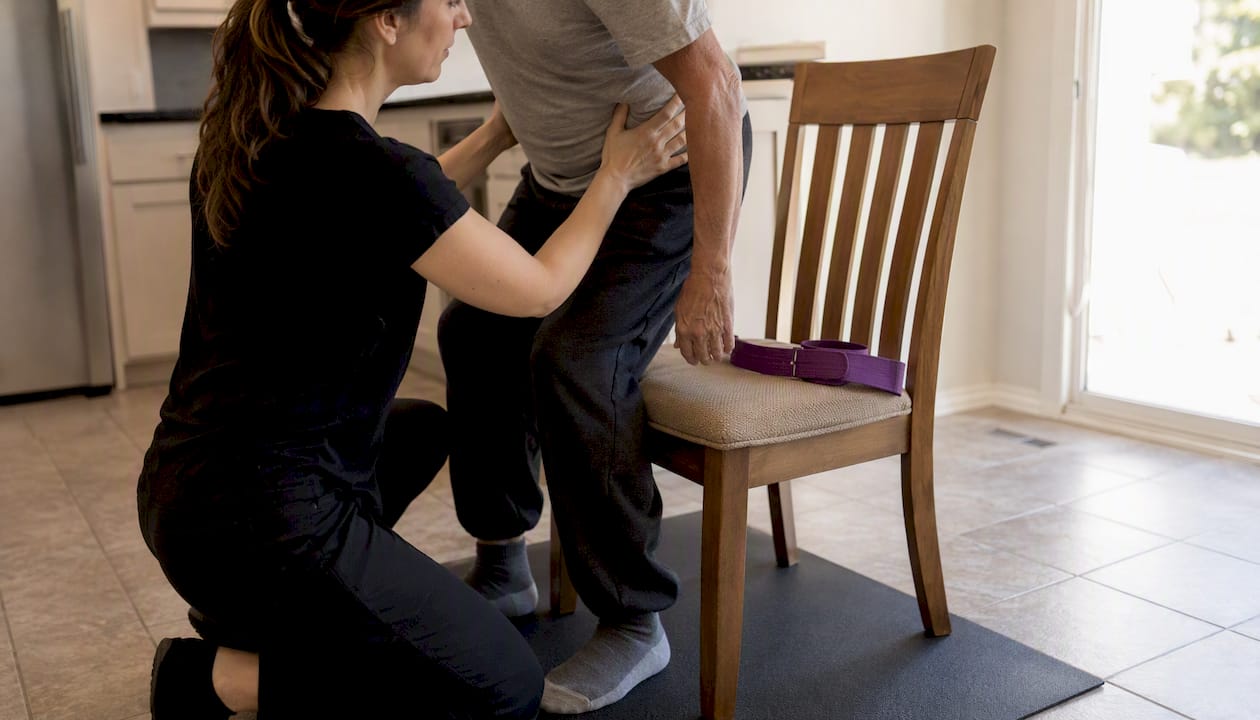
Pro Tip: Run one dry-run transfer using the patient’s current bed or chair before the new equipment arrives. It surfaces problems — wrong height, wrong grip, wrong footwear — when the stakes are low.
Quick safety check before the first real transfer: bed brakes locked, footrests swung away, caregiver positioned on the stronger side, patient’s feet flat on the floor.
Make the home safe for equipment and daily use
Removing trip hazards is not optional. A loose rug under a wheelchair wheel or a cord across a scooter path can cause a fall on day one.
The day before delivery:
- Pull up all loose rugs and bath mats along the route and in the destination room.
- Tape down or reroute any power cords crossing walkways.
- Move small furniture, footstools, and decorative items out of the path entirely.
- Check that the flooring is stable: no soft spots, lifted edges, or slippery surfaces.
Electrical readiness: power hospital beds and mobility scooters need a grounded outlet within reach. Place the bed near a grounded outlet and consider a surge protector for any motorized equipment. Keep the cord routed along the wall, never across a walking path.
Room layout: position the bed or chair so the transfer side has a clear 36-inch lane. Put the call button, water, phone, and medications on the accessible side. If there are stairs between the delivery vehicle and the room, plan an alternate route or ask the team whether a ramp is needed.
Morning of delivery: do a final walk-through. Confirm the path is clear, the outlet is accessible, and someone is home who can direct the team.
What to expect from the delivery team and what paperwork to have ready
Delays almost always come from missing documents or access problems the family forgot to mention. Fix both before the truck leaves the warehouse.
Documents and information to have ready:
- Government-issued photo ID
- Rental agreement or reservation confirmation number
- Prescription or standard written order (required for some insured equipment)
- Payment method confirmed and available
- A reachable phone number for the delivery window
Pre-delivery communication checklist:
- Confirm the delivery window (morning, afternoon, or a two-hour slot).
- Tell the team about parking, elevator access, and building entry codes.
- Ask whether the service includes white-glove in-room setup or drop-ship only.
White-glove delivery includes in-room assembly, packaging removal, and a feature walkthrough. Drop-ship means the team brings it to the door and leaves. Know which one you booked.
Hospitals often coordinate discharge planners or case managers to arrange durable medical equipment. If you are coming home from a hospital stay, ask the discharge coordinator to send the order to your supplier early so same-day delivery is possible.
Seventhchakra lists transparent delivery fees for the Metro Vancouver area, so you can confirm costs before the team arrives rather than after.
Quick operation and safety checks to run with the delivery technician
Do not let the technician leave until you have run through this list together.
- Verify accessories: charger, remote, cushion, footrests, side rails, tubing. Check each item against the packing list.
- Test brakes: engage and release on both sides of a wheelchair; confirm the scooter’s parking brake holds on a slight incline.
- Check battery charge: confirm the battery indicator and ask how long the first charge should take.
- Confirm weight limit: every piece of equipment has one. Make sure the patient’s weight falls within it.
- Power on: plug in, power up, and confirm all controls respond before the technician leaves.
Ask for a demonstration of the primary controls and one emergency drill: how to stop an electric scooter quickly, how to lower a power bed manually if the power fails, and how to unlock a wheelchair’s anti-tip mechanism.
Pro Tip: Take photos of the equipment from four angles before the technician leaves, and get a signed delivery checklist. If a scratch or missing part shows up later, you have dated proof of the condition at arrival.
Quick fixes and who to call if something goes wrong after delivery
Most first-day problems are minor and fixable in under ten minutes.
Common issues and first checks:
- Dead battery: plug in and charge for the full recommended cycle before assuming a fault.
- Stuck control or joystick: power off completely, wait 30 seconds, power back on.
- Missing accessory: check the packaging thoroughly before calling; accessories are often packed inside the seat cushion or under the mattress.
- Fit problem: if the seat width or bed height is wrong, call the supplier immediately. Do not attempt to modify the equipment yourself.
When you call support, have ready: your order number, the equipment’s serial number (usually on a sticker under the seat or frame), two or three photos of the issue, and a brief description of when it started. Most providers can diagnose and dispatch a replacement part or swap unit within the same business day when you have this information ready.
For power-dependent medical devices — oxygen concentrators, powered hospital beds — treat any malfunction as urgent. Call the provider’s after-hours line immediately and do not use the device until a technician confirms it is safe.
Understand rental rules, pickup, and common fees before delivery
Read the rental agreement before the equipment arrives, not after.
Key contract items to check:
- Billing start date: does it begin on delivery day or the day you sign?
- Delivery and pickup fees: are they included or billed separately?
- Repair and replacement responsibility: who pays if a part breaks through normal use?
- Cleaning and damage rules: what counts as damage versus normal wear?
Charges families commonly miss: exchange fees if you need a different size, return pickup charges, late return fees, and replacement part costs for consumables like cushion covers or tubing.
Pro Tip: Ask the supplier in writing what “sanitised” means in their agreement. A general claim is not the same as a documented disinfection protocol.
Families frequently underestimate the importance of clarifying who is responsible for pickup and what sanitisation actually covers. Get both in writing before delivery day.
Sanitisation best practices and infection-prevention steps
Ask your supplier directly: is the equipment sanitised before delivery, and what method do they use? A reputable provider will tell you. Seventhchakra sanitises equipment before every delivery and provides tailored rental terms and ongoing support.
When the equipment arrives:
- Wipe all hard surfaces (armrests, joystick, bed rails, control panel) with a hospital-grade disinfectant wipe before the patient touches them.
- For cushions and fabric surfaces, check the manufacturer’s cleaning instructions before applying any product. Most covers are removable and machine washable.
- For oxygen or life-support devices, follow the supplier’s infection-control instructions exactly. Do not use household sprays on tubing or masks.
Pro Tip: If a patient is immunocompromised, ask the supplier for documentation of the sanitisation method used. A written record is reasonable to request and a good supplier will provide it.
During setup, anyone handling the equipment should wash hands before and after. If the patient is vulnerable, the delivery technician wearing a mask during in-room setup is a reasonable request.
One-page pre-delivery checklist
One week before:
- [ ] Measure front door, hallway, all 90° turns, and destination room door (record in inches)
- [ ] Confirm delivery window and white-glove vs. drop-ship service
- [ ] Review rental agreement: billing date, pickup fees, damage policy
- [ ] Ask supplier about sanitisation protocol
One day before:
- [ ] Remove all loose rugs, cords, and small furniture from the delivery path
- [ ] Confirm grounded outlet is accessible and clear
- [ ] Brief all caregivers on transfer plan and roles
- [ ] Confirm parking and building access details with delivery team
Day of delivery:
- [ ] Door: _____ in. / Hall: _____ in. / Turn: _____ in. / Outlet: _____ ft. from equipment location
- [ ] Someone home and reachable by phone during the delivery window
- [ ] Photo ID and rental confirmation ready
- [ ] Take photos of equipment on arrival before signing
- [ ] Get signed delivery checklist from technician
A note from Seventh Chakra on same-day delivery and safety
Same-day delivery sounds simple. In practice, it only works when the supplier has trained staff, clean equipment, and a clear process for in-room setup. That is what Seventhchakra has built in Greater Vancouver.
Every wheelchair, mobility scooter, and hospital bed rental goes through sanitisation before it leaves the warehouse. The delivery staff are trained to set up equipment in the room, walk caregivers through the controls, and answer questions before they leave. No deposit is required to book, and rental terms are flexible enough to match a recovery timeline rather than a fixed calendar.
The families who have the smoothest delivery days are the ones who called ahead, measured their space, and had a caregiver ready. This guide covers everything on that list. Seventhchakra handles the rest.
Seventhchakra’s same-day rentals for wheelchairs, scooters, and hospital beds
When you need equipment today, not next week, Seventhchakra delivers to Metro Vancouver with no upfront deposit and no guesswork on pricing.
The rental options cover the equipment families need most: hospital bed rentals with electric adjustment and same-day delivery, wheelchair rentals for short and long-term needs, and mobility scooter rentals for anyone who needs to move independently. Every unit is sanitised before delivery, and a trained technician sets it up in the room and walks you through operation before leaving.
To book, have your delivery address, preferred window, and the patient’s weight and height ready. Call or book online, and Seventhchakra will confirm availability and delivery time the same day.
Sources
- Patient safety checklist: before, during, and after care — When Doctors Don’t Listen
This article is general information, not a substitute for advice from a qualified doctor. Consult a qualified healthcare professional about your own circumstances before acting on anything here.
FAQ
What measurements do I need before equipment delivery?
Measure every doorway, hallway, and 90° turn along the delivery route. Standard post-1990 doors run 32–36 inches wide, and large equipment like a hospital bed needs roughly 42 inches of clear pivot space.
Does Seventhchakra sanitise equipment before delivery?
Yes. Seventhchakra sanitises all equipment before delivery and provides in-room setup with a technician walkthrough, with no upfront deposit required.
What documents should I have ready when the delivery team arrives?
Have a government-issued photo ID, your rental confirmation or order number, and your payment method ready. A prescription or written order may also be needed for insured equipment.
What should I do if the equipment does not fit through a doorway?
Call your supplier immediately. Hospital beds can often be disassembled for entry through tighter spaces, and a trained delivery team can advise on removing a door from its hinges to gain 1.5–2 extra inches of clearance.
How do I document delivery condition to avoid disputes later?
Photograph the equipment from four angles before the technician leaves, and ask for a signed delivery checklist. Note any scratches, missing accessories, or damage on the checklist before you sign it.


