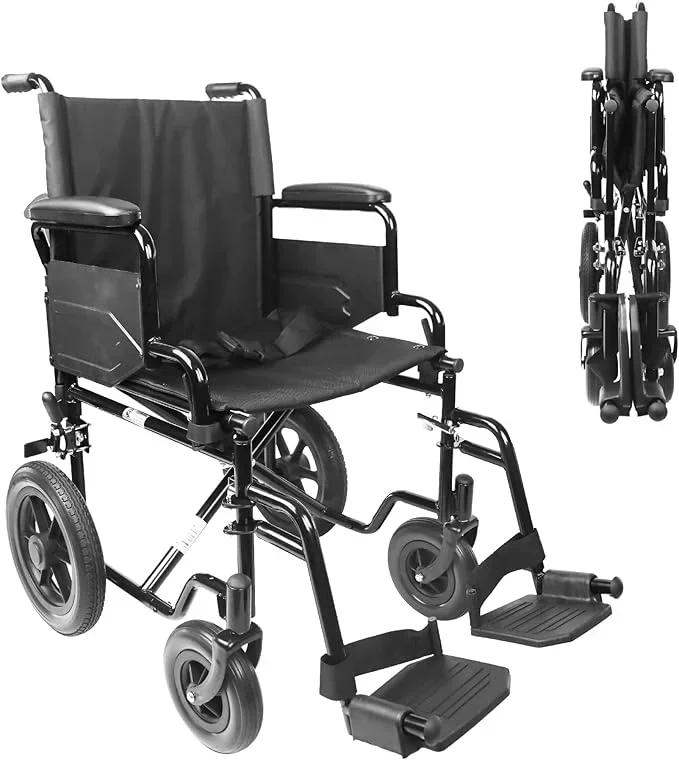
Transfer Board Use: Safe Steps and Same Day Rentals for Caregivers

Lock the wheelchair brakes, remove the arm and footrests closest to the target surface, bridge the board firmly between both surfaces, then move with small, controlled lifts instead of sliding. This sequence follows guidance from the University Health Network’s spinal cord rehab program, and we outline the setup, step-by-step transfers, and safety checks below so you can move between a bed, wheelchair, or shower with less risk of injury.
TL;DR:
- Assess sitting balance, arm strength, and ability to follow instructions; arrange supervised practice with an occupational or physical therapist before solo transfers if uncertain.
- Choose a board suited to the gap and rated for the person’s weight; if either end cannot rest securely, use a mechanical lift instead.
- Sliding across a board can shear skin and cause pressure wounds, so reposition the hands between small lifts instead of dragging across the surface.
- For shower transfers, confirm the board is approved for wet use, minimize the height difference, and add grab bars and a nonslip mat.
- Stop if pain, new skin damage, or unsafe weight bearing occurs; seek professional guidance about assistance from two caregivers or a mechanical lift.
Table of Contents
- Why use a transfer board and when it helps
- Prepare and assess: check the person, environment and equipment
- Step-by-step transfer: wheelchair to bed
- Step-by-step transfer: wheelchair to shower bench and back
- Safety tips and common mistakes to avoid
- How to choose the right transfer board
- Care, cleaning and storage
- When to stop using a transfer board and get professional help or different equipment
- A caregiver’s honest take on practice and preparedness
- Getting the right equipment fast with Seventh Chakra
- FAQ
- Sources
Why use a transfer board and when it helps
A transfer board bridges two surfaces to support a transfer. The board should be firmly placed on both surfaces before use.
Caregivers reach for a transfer board in several everyday situations.
- Moving between a wheelchair and a bed, especially first thing in the morning or at bedtime.
- Getting into or out of a shower bench or tub seat.
- Transferring into a car seat for an appointment or outing.
- Shifting from a wheelchair to a sofa or recliner at home.
Small, controlled lifts help avoid sliding. TAP transfer board guidance advises lifting in small increments rather than sliding, which can cause skin shearing and pressure wounds.
Prepare and assess: check the person, environment and equipment
A safe transfer starts well before anyone touches the board. Rushing the setup can create problems.
Start with the person. Consider their sitting balance, how much weight they can push through their arms, and whether they can follow step-by-step instructions during the move. If any of these are uncertain, a supervised practice session or an assessment from an occupational or physical therapist is worth arranging before attempting transfers alone.
Next, look at the environment:
- Clear any obstacles, loose rugs, or cords from the transfer path.
- Confirm the two surfaces are close in height or that the difference is manageable.
- Check that the floor is stable and non-slip, especially near a bed or shower.
- Make sure the area is well lit so hand and foot placement is visible.
Finally, check the equipment itself. UHN’s rehabilitation guide advises locking the wheelchair brakes and removing or swinging away the arm and footrest on the side closest to the target surface before placing the board. Confirm the board’s length suits the gap, that its weight rating matches or exceeds the user’s body weight, and that both ends sit firmly and fully on their respective surfaces. The same guidance warns that if the gap is too wide or unstable even with the board in place, a mechanical lift may be the safer choice instead.
Step-by-step transfer: wheelchair to bed
This sequence works for a person transferring with their own arm strength, with a caregiver nearby to guide and support as needed.
- Position the wheelchair at a slight angle to the bed rather than perfectly parallel; this angle often gives a more efficient pivot based on the user’s upper-body strength, and an occupational or physical therapist can help fine-tune it for a specific person.
- Lock the wheelchair brakes and remove or swing away the armrest and footrest on the side nearest the bed.
- Shift the person forward in the seat so their hips are near the front edge of the wheelchair cushion.
- Place one end of the board squarely under the upper thigh or buttock and let the far end rest firmly on the bed surface, checking that both ends are fully supported.
- Position one hand near the middle of the board and the other on the seat or armrest for leverage.
- Lift the body weight in small, controlled increments, moving a short distance at a time and repositioning the hands between each lift rather than sliding across the board in one motion.
- Once fully seated on the bed, shift weight off the board and remove it before settling into position.
If a caregiver is assisting, coordinate the move with a verbal count so both people lift together. The caregiver can brace their own body away from the direction of the lift, help guide the legs and hips through the pivot, and confirm the board is clear before the person settles fully onto the bed.
Pro Tip: Keep clothing covering the hips and thighs during the transfer. It reduces direct skin contact with the board and lowers the chance of friction injury, a point UHN’s guide specifically calls out.
Step-by-step transfer: wheelchair to shower bench and back
Wet surfaces add a layer of risk that bedroom transfers don’t have, so a bit of extra setup pays off.

Arrange the shower bench and wheelchair close together before starting, aiming to minimize the height difference between them and making sure there’s a clear path with nothing blocking the wheels or the board’s placement. Check the board manufacturer’s instructions before using it in a wet environment, and keep hand contact areas as dry as possible before gripping.
In the shower space itself:
- Use the same small-lift technique described above rather than sliding, even though the surface may feel slippery.
- Plan foot placement ahead of the lift so feet don’t shift unexpectedly mid-transfer.
- Use grab bars where available to add a stable point of contact during the pivot.
- Place a non-slip mat under the wheelchair and bench to reduce the chance of either surface shifting.
If the shower bench sits much higher or lower than the wheelchair seat and that gap can’t be adjusted, this is a case where a transfer board may not be the right tool. A therapist can recommend an alternative, such as a transfer bench designed to span the tub wall, or a different equipment setup suited to that bathroom’s layout.
Safety tips and common mistakes to avoid
Some transfer risks can be reduced by checking the setup before each transfer.
Avoid sliding. Dragging across a transfer board can cause skin shearing and pressure wounds, according to UHN’s spinal cord rehabilitation program. Beyond that:
- Always lock the brakes on both surfaces when possible, and remove anything that could block the transfer path.
- Check the board’s weight limit against the user’s actual body weight before every use, not just the first time.
- Confirm both ends of the board sit on stable, non-slip contact points before any weight goes on it.
- Avoid rushing: take the time to reposition hands between each small lift.
- Don’t attempt a transfer alone if the person has limited arm strength, poor balance, or a history of falls, since two caregivers working together are safer than one working quickly.
Common errors worth watching for include an unsupported board end that shifts mid-transfer, hands placed too close to the body’s weight-bearing point instead of on the board or armrest, and skipping the pre-transfer check because “it worked fine last time.” When a person’s condition changes, such as reduced arm strength or new skin breakdown, that’s a signal to bring in a second caregiver or consider a mechanical lift rather than continuing with a single-person board transfer.
How to choose the right transfer board
Picking the right board comes down to a handful of practical features rather than brand names or price alone. Clinical guidance on transfer boards points to a consistent set of must-haves:
- A length suited to the gap between the two surfaces and the user’s positioning.
- A weight capacity suited to the user’s needs, following the manufacturer’s instructions.
- A non-slip base on the underside so the board doesn’t shift once weight is applied.
- Handles or cut-out grips, along with rounded edges, which make positioning easier and reduce the chance of pinching skin.
- A smooth, low-friction top surface that still allows controlled small lifts rather than an uncontrolled slide.
Material and weight matter if the board needs to travel, since a lighter board is easier to pack for car trips or visits away from home. For shower or tub transfers, check the manufacturer’s instructions to confirm whether the board is suitable for wet environments.
Because the right length and shape depend on the specific furniture, wheelchair seat height, and the user’s own body, an assessment with an occupational therapist is worth arranging before buying, particularly for a first-time user. If seat height compatibility is part of what you’re weighing, our guide to lightweight wheelchair options for caregiving covers how wheelchair dimensions interact with transfer setups.
Care, cleaning and storage
A transfer board sees a lot of contact with skin and clothing, so keeping it clean matters for hygiene as much as for safety.
- Wash the board with soap and water after any soiling, and let it dry completely before the next use.
- Inspect it regularly for cracks, a worn or peeling non-slip base, or rough or damaged edges.
- Store it flat or hung according to the manufacturer’s instructions to avoid warping over time.
- Recheck the weight-rating label periodically, and retire the board if you notice any structural damage, no matter how minor it looks.
A board that’s cracked, warped, or missing its non-slip grip is no longer doing its job, even if it still looks usable at a glance.
When to stop using a transfer board and get professional help or different equipment
A few warning signs mean it’s time to pause and reassess rather than push through a transfer. Pain during the move, any sign of skin breakdown or a new pressure wound, or an inability to follow instructions or bear weight safely are all reasons to stop and look at other options.
Alternatives at that point include a two-person assisted transfer, a sit-to-stand device, or a mechanical lift, along with a referral to occupational or physical therapy for a fuller assessment of what’s changed. If you’re mid-transfer and something feels wrong, the priority is to keep the person safe and comfortable exactly where they are and call for help rather than trying to finish the move solo. A board transfer that doesn’t feel stable partway through is not one to force to completion.
A caregiver’s honest take on practice and preparedness
The instructions above matter, but they only become second nature through supervised practice, ideally with an occupational or physical therapist watching the first few attempts. What we see less discussed is how often the real barrier isn’t technique, it’s not having the right equipment on hand when a transfer need appears suddenly. Pairing solid technique with access to sanitized equipment closes that gap faster than reading alone ever will.
— Chandan
Getting the right equipment fast with Seventh Chakra
When a transfer need shows up without warning, having the right mobility equipment on hand makes every technique above easier to apply safely. Ask us about equipment availability, delivery timing, deposit requirements, and rental terms.

Ask about our wheelchair rentals and mobility scooter rentals for mobility support at home or outdoors. We also stock hospital beds, lift chairs, and patient lifts for households managing a fuller recovery setup. Reach out through Seventh Chakra to check availability and delivery options.
This article is general information, not a substitute for advice from a qualified doctor. Consult a qualified healthcare professional about your own circumstances before acting on anything here.
FAQ
How can you help an older adult transfer from a bed to a wheelchair?
Position the wheelchair close to the bed at a slight angle, lock the brakes, and remove the near armrest and footrest. Place a transfer board firmly under the person’s thigh with the other end on the wheelchair seat, then guide them through small, controlled lifts rather than sliding, as recommended by UHN’s spinal cord rehabilitation program.
What is a transfer board?
A transfer board is a smooth, rigid board used to bridge the gap between two seated surfaces, such as a wheelchair and a bed, so a person can move across it with small lifts instead of being carried. Features like rounded edges, handles, and a non-slip base make it easier and safer to use, according to clinical transfer board guidance.
How do you transfer from a wheelchair to a shower bench?
Position the wheelchair and shower bench close together to minimize the height gap, lock the brakes, and use a board rated for wet environments. Move with small, controlled lifts, using grab bars and a non-slip mat for stability rather than sliding across the wet surface.
What are the steps for transferring a patient from a bed to a stretcher?
A bed-to-stretcher transfer typically involves aligning the two surfaces at matching heights, locking both sets of wheels, and bridging the gap with a slide sheet or transfer board so the patient can be moved with minimal friction. This kind of transfer usually involves trained staff or two caregivers rather than a single person working alone, given the added equipment and coordination involved.
Do I need professional training to use a transfer board safely?
Formal training isn’t always required, but supervised practice with an occupational or physical therapist is strongly recommended before attempting transfers alone, especially for a first-time user or caregiver. A therapist can also confirm the board length and setup suit the specific person’s body and environment.