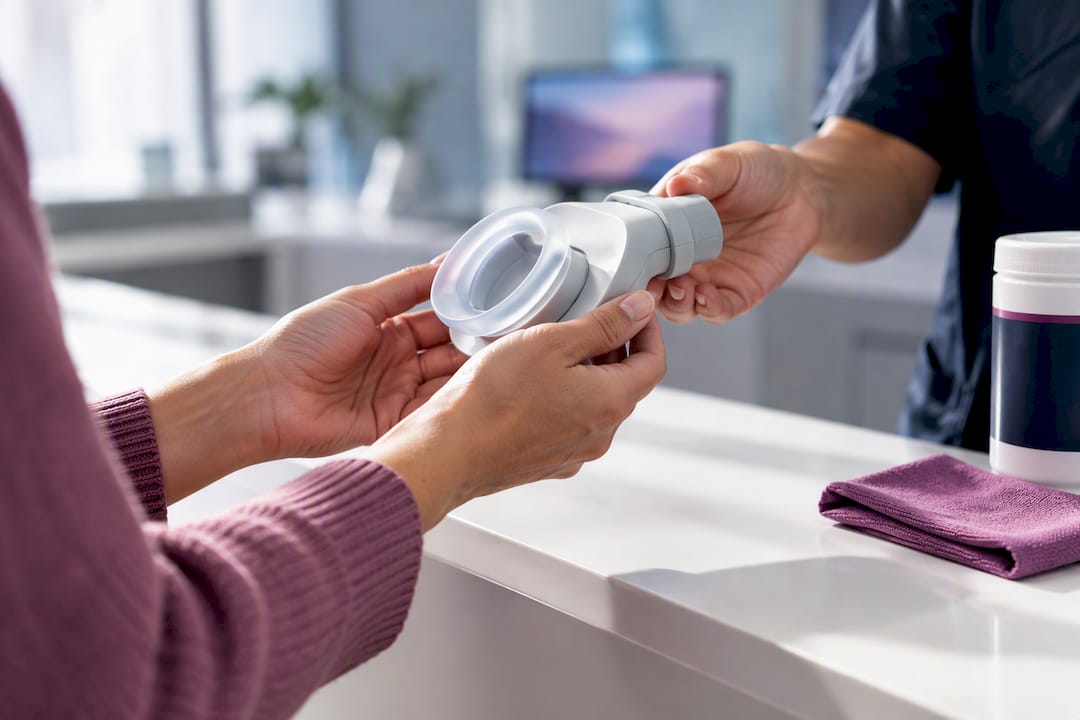
Fast Same Day Setup: Home Discharge Equipment Checklist for Vancouver

Ask for the discharge plan in writing before you leave the hospital, and make sure it names every piece of equipment, who delivers it, and who trains you to use it. That single document should list activity and fall precautions, medications, follow-up contacts, and the exact devices you’re expected to have at home. This checklist follows that plan step by step, organized by the daily tasks a patient and caregiver actually face: getting in and out of bed, reaching the bathroom, bathing, and moving safely through the house.
TL;DR:
- Confirm that the discharge plan includes detailed equipment delivery, training, and activity restrictions, and obtain it in writing before leaving the hospital.
- Measure doorways, hallways, and turns in the home to ensure mobility devices match the actual route and patient’s physical needs.
- Ensure bathrooms are equipped with secure grab bars, non-slip surfaces, and environmental adjustments like lighting and clutter removal to reduce fall risks.
- Have a caregiver demonstrate transfer techniques on-site to ensure proper training and avoid fall hazards, especially for wheelchair transfers and bedding repositioning.
- Arrange for same-day rental of hospital beds, wheelchairs, and other supportive equipment with verified setup, inspection, and proper documentation to prevent last-minute delays.
Table of Contents
- Before you leave: getting a written discharge plan you can actually use
- Mobility and transfers: what to check before you order anything
- Bathroom and toileting: the checklist that prevents most falls
- Bedroom and bed setup: getting the hospital bed right
- Medication, supplies, and monitoring: closing the gaps hospitals miss
- Home modifications and quick fixes that cut fall risk fast
- Caregiver training and knowing when to call in OT or PT
- Getting equipment fast: rental, delivery, and what to ask vendors
- Seventh Chakra: rental equipment that matches what this checklist requires
- Author note: the one habit that catches most discharge mistakes
- How to get the equipment you need today
- Sources
- FAQ
Before you leave: getting a written discharge plan you can actually use
A verbal summary from a busy nurse on discharge day is not a plan. It’s a recollection, and recollections fade the moment you’re loading a car in the hospital parkade. HealthLink BC’s discharge planning guidance is blunt about this: patients and caregivers should leave with a written document, not a verbal handoff, because equipment, home care needs, and follow-up instructions get lost otherwise.
That written plan needs to answer a few concrete questions. What can the patient do, and what are they restricted from doing (lifting limits, weight bearing, stair use)? What equipment is required, and has it already been ordered? Who is the caregiver of record, and have they received training on transfers, medication administration, or wound care? Who does the family call at 2 a.m. if something goes wrong?
Coordinating this among the patient, the caregiver, and the discharge planner matters more than most families realize. Discharge works best as a three-way conversation, not something handled entirely by hospital staff while the family waits in the hallway. If you’re not in the room for that conversation, ask to be.
Before you sign anything or head home, confirm these items are documented:
- A named caregiver responsible for equipment, medications, and the discharge plan itself
- Delivery and setup times for any large equipment (hospital bed, patient lift, wheelchair)
- A scheduled hands-on demonstration for every device the caregiver hasn’t used before
- Activity and fall precautions specific to this patient’s condition, not generic boilerplate
- A phone number for questions that isn’t just “call 911 if it’s bad”
If the hospital team can’t produce written answers to these, push back. A rushed discharge on a Friday afternoon is exactly when equipment gets forgotten and caregivers get sent home without training. Our guide on continuum of care equipment breaks down how these handoffs are supposed to work across the system, which is useful if you want to know what “supposed to happen” looks like versus what sometimes actually happens.
Mobility and transfers: what to check before you order anything
Equipment needed after discharge starts with a tape measure, not a catalogue. Before you rent or buy a single mobility device, walk the actual route the patient will take: front door to bedroom, bedroom to bathroom, any stairs, any narrow turns near a kitchen island or hallway closet. Measure doorway widths. A standard wheelchair typically needs about 32 inches of clearance, and older homes routinely fall short of that. Photograph anything that looks tight. Testing the route before ordering equipment is the single most skipped step in home discharge planning, and it’s the one that causes the most frustration a week later when a rented wheelchair won’t clear the bathroom door.
Once you know the route, confirm the device itself matches the person, not just the diagnosis. A walker prescribed for balance issues is a different animal from a rollator prescribed for someone who tires easily but doesn’t need constant support. Mobility device suitability needs to be documented against the person’s strength, balance, weight, and the specific route they’ll be using at home, not chosen off a generic list.
The pre-discharge mobility checklist
- Measure the route. Doorways, hallway width, any thresholds or steps, and turning space near the bed and toilet.
- Confirm the prescription details. Device type, indoor versus outdoor use, weight limit, and whether it’s intended as a permanent or temporary aid.
- Check weight ratings against the actual patient. A device rated below the patient’s weight is a safety failure waiting to happen, not a minor mismatch.
- Identify transfer aids needed. A transfer board, gait belt, or slide sheet should be listed if the patient can’t bear full weight during transfers.
- Require an in-hospital demonstration. The caregiver should physically practise the transfer with hospital staff supervising before discharge day, not learn it from a pamphlet at home.
- Confirm brake function and locking mechanisms on any wheelchair or transport chair before it leaves the building.
- Ask about a return-demonstration. Staff should watch the caregiver perform the transfer once, unprompted, to confirm the training actually landed.
Wheelchair transfers deserve their own attention because they’re where falls happen. Brakes locked on both sides, every time, no exceptions. The chair positioned at an angle to the bed or toilet rather than straight on, which shortens the pivot distance. A stable surface to transfer onto, never a rolling office chair or a wobbly commode. If the patient can’t bear enough weight to pivot safely, a transfer board bridges the gap between two surfaces and removes the need to stand at all.
Pro Tip: Practise the exact transfer you’ll be doing at home, not a simplified hospital version. If your bathroom doorway is narrower than the hospital room, ask staff to simulate that constraint during the demonstration so you’re not improvising the first time it matters.
Our caregiver’s guide to choosing mobility equipment goes deeper on matching device type to specific transfer challenges, which is worth a read if the patient has more than one mobility limitation at once (weak grip plus balance issues, for instance).
Bathroom and toileting: the checklist that prevents most falls
Bathrooms cause more home injuries than almost any other room, and for a discharged patient with reduced strength or balance, the risk multiplies. Nearly half of all injuries among seniors happen at home, and bathrooms and stairs are the two areas Health Canada flags most consistently.
Start with distance, not equipment. If the walk from bedroom to bathroom is long, involves a turn, or crosses a threshold, a bedside commode may be the safer choice for the first week or two, even if the goal is eventually walking to the bathroom unassisted. There’s no dignity in a 3 a.m. fall halfway down a hallway.
For the bathroom itself, the core equipment list looks like this:
- Grab bars, securely anchored into wall studs, not suction-mounted to tile
- A shower or bath seat rated for the patient’s weight, positioned so they don’t need to step over a tub edge to sit
- A raised toilet seat, which reduces how far someone needs to lower themselves, a small change that matters enormously for hip and knee patients
- A hand-held shower head, so bathing doesn’t require standing under a fixed showerhead
- Non-slip mats or strips, both inside the tub/shower and on the bathroom floor outside it
By the numbers: Health Canada identifies bathrooms and stairs as the highest-risk areas in the home, and recommends grab bars, shower seats, raised toilet seats, non-slip surfaces, and improved lighting as the core response. Read the full guidance.
Beyond the fixtures, the small environmental details matter just as much. Remove throw rugs entirely rather than taping them down. Clear cords away from walking paths. Add nightlights in the bathroom and hallway so a middle-of-the-night trip doesn’t happen in the dark. Keep a towel and cleaning supplies within reach of the shower, because spills happen and a wet floor with no towel nearby is how a second fall follows the first.
One point worth taking seriously: devices alone don’t solve this. Grab bars and shower seats don’t help if the floor around them is cluttered or the lighting is poor — equipment and environment have to work together, not one instead of the other.

If grab bars or a raised toilet require anchoring into tile or drywall, get them professionally installed rather than attempting an ad hoc fix. A grab bar that pulls out of the wall under load is worse than no grab bar at all, because the patient trusted it. Our guide to bathroom safety equipment for seniors covers fit and installation specifics if you’re setting this up for the first time.
Bedroom and bed setup: getting the hospital bed right
A hospital bed changes the entire logic of a recovery bedroom, and getting the setup wrong creates daily friction that a family often doesn’t notice until week two, when everyone’s exhausted.
Before delivery day, confirm four things with whoever is supplying the bed: assembly and setup are included, there’s a power outlet within reach of the bed’s cord (electric adjustable beds need one), the bed’s weight rating matches the patient, and whether the clinical team recommends bed rails for this specific patient. Bed rails aren’t automatic. Some patients need them for repositioning support; others find them a hazard they try to climb over.
Placement in the room matters as much as the bed itself:
- Position the bed so there’s a clear, unobstructed path to the bathroom or bedside commode
- Leave enough space on the transfer side for a wheelchair or walker to approach at the right angle
- Keep the call button, phone, and any emergency alert device within arm’s reach at all times
- Route the overbed table so its wheels and cord don’t cross the main walking path
- Confirm the mattress height allows the caregiver to reposition the patient without straining their own back
Repositioning is the part families underestimate most. If the patient can’t shift their own weight in bed, that’s a two-person task in most cases, not something one exhausted caregiver should attempt alone at 4 a.m. A drawsheet, positioned under the patient’s hips and shoulders, lets two caregivers reposition someone with a coordinated pull instead of a lift. Ask the hospital team to demonstrate this specific technique before discharge, not a generic version.
If you’re renting rather than buying, our hospital bed rental page outlines what’s included in setup, which is worth checking against whatever your discharge planner has already arranged so nothing gets duplicated or missed.
Medication, supplies, and monitoring: closing the gaps hospitals miss
Medication errors after discharge are common enough that reconciling the list before you leave should be treated as non-negotiable, not optional paperwork. Sit down with the pharmacist or discharge nurse and build one single list: every prescription, every over-the-counter medication, every supplement, with dosages and timing spelled out. If anything changed during the hospital stay, a dose adjusted or a medication discontinued, that change needs to be explicit on the list, not something the family is expected to remember from a hallway conversation.
Beyond medication, most patients go home with at least one monitoring or supply need that requires its own small checklist:
- Oxygen equipment: confirm delivery timing, tank or concentrator setup, and that someone has demonstrated how to change settings or swap tanks
- Wound-care supplies: dressings, tape, saline, and a clear schedule for changes, plus what abnormal signs (redness, odour, increased drainage) should trigger a call
- Pulse oximeters or glucometers: confirm someone has shown the caregiver how to read results and what numbers warrant concern
- Infusion pumps or feeding equipment: these almost always need a dedicated training session, not a quick verbal rundown
Label everything. A shelf or bin with medication, wound-care supplies, and monitoring devices clearly marked saves real time during a stressful week, and it means a second caregiver (a sibling covering a shift, a home care worker) can find what they need without a scavenger hunt.
Batteries and alarms deserve a specific mention. Pulse oximeters, glucometers, and some monitoring devices run on batteries that die without warning. Check before the first use, not after an alarm goes silent overnight.
Home modifications and quick fixes that cut fall risk fast
Some of the most effective home safety changes cost nothing and take twenty minutes. Before any equipment arrives, walk through the main paths of the house (front door to bedroom, bedroom to kitchen, bedroom to bathroom) and clear them completely.
- Remove loose rugs entirely. Don’t tape them down; take them up. A rug edge is a trip hazard regardless of how flat it sits.
- Tape or route cords along walls. Extension cords and charger cables crossing a walking path are a common, preventable cause of falls.
- Add lighting where it’s currently dim. Hallways, staircases, and the path from bed to bathroom need light a patient can turn on without fumbling in the dark.
- Rearrange furniture for turning space. A wheelchair or walker needs roughly a 60-inch turning radius in tight spots like hallway junctions or bedroom doorways.
- Add a threshold ramp at any raised doorway lip that would catch a wheelchair wheel or a walker leg.
- Position rest points along long routes. If the walk from bedroom to living room is more than a few metres, a sturdy chair partway along gives a tiring patient somewhere to pause.
- Reposition the bedside commode if the first placement turns out to block a doorway or the transfer angle is awkward once the bed is actually in use.
Pro Tip: Do this walkthrough at night with the lights you’d realistically use, not the overhead lights on full during a daytime inspection. Fall risk spikes overnight, and a hallway that looks fine at noon can be genuinely hazardous at 2 a.m.
Households managing mobility or cognitive needs alongside a recovery often find broader home safety planning resources useful for thinking through routes and routines beyond the strictly medical equipment list.
Caregiver training and knowing when to call in OT or PT
One person needs to own this. Not “the family,” not “whoever’s around.” One named caregiver should hold the written discharge plan, the medication list, the equipment contacts, and the emergency numbers, and everyone else in the household should know who that person is. Federal guidance on care transitions points to exactly this: know the discharge plan, check the home for safety gaps, and keep emergency contacts within reach, all organized around a clear point person.
That caregiver needs actual hands-on training, not a verbal walkthrough, for anything involving lifting, transferring, or operating equipment. The gold standard is a return-demonstration: the caregiver performs the transfer or the device setup once, in front of hospital staff, with no prompting. If a nurse just shows you once and asks “does that make sense?”, ask to try it yourself before you leave.
Watch for these signals that a home visit from an occupational therapist or physiotherapist is worth requesting rather than skipping:
- Stairs are the only way to reach a bedroom or bathroom
- The patient’s functional limits (grip strength, balance, endurance) seem more severe than the equipment ordered accounts for
- The home layout has tight turns, narrow doorways, or multiple level changes
- The caregiver feels genuinely unsure about a transfer technique even after the hospital demonstration
- The patient lives alone for part of the day and needs an emergency response plan, not just equipment
An OT or PT home visit isn’t an admission that something’s wrong. It’s a second set of trained eyes on a space the hospital team has never actually seen, and it routinely catches problems a generic checklist can’t.
Getting equipment fast: rental, delivery, and what to ask vendors
Timing rarely cooperates with discharge planning. A bed gets confirmed for tomorrow morning and suddenly there’s a hospital bed, a wheelchair, and a bedside commode all needed within 24 hours. This is where rental beats buying for almost every recovery scenario, because the equipment shows up fast and you’re not stuck owning a hospital bed once recovery is finished.
Public loan programs exist in most regions, but they typically require a clinician referral and often carry waiting lists that don’t match a Friday discharge. Private rental with same-day delivery is the practical fallback when timing is tight, which covers most real-world discharges.
Whichever vendor you use, ask these questions before equipment arrives:
- Is assembly and setup included, or will the family need to do it themselves?
- What’s the weight rating, and does it match the patient with margin to spare?
- For patient lifts specifically, is the sling compatible with this exact lift model, and has it been inspected for damage?
- Is there a delivery or pickup fee beyond the rental price, and is it a flat rate or does it vary by item size?
- Is the equipment sanitized before delivery, and can that be confirmed rather than assumed?
- What’s the process for returning the equipment once it’s no longer needed?
Photograph the equipment on delivery, before anyone uses it. It documents condition and saves an argument later about pre-existing wear. Keep the manufacturer’s instruction booklet somewhere accessible, not tossed in a drawer, because troubleshooting a stalled hospital bed motor at 11 p.m. goes faster with the actual manual in hand. For families in the Lower Mainland working through this on a short timeline, our guide to arranging same-day recovery equipment walks through how that coordination typically works with an OT already involved.
Seventh Chakra: rental equipment that matches what this checklist requires
Everything on this checklist points to the same conclusion: get the right device, get it fast, and get proper training with it. That’s the specific gap Seventhchakra fills for families across the Greater Vancouver area.
The core rental lineup covers most of what a discharge plan calls for:
- Standard wheelchairs and transport chairs for indoor and outdoor mobility
- Mobility scooters for patients who need to cover more ground than a wheelchair comfortably allows
- Bariatric wheelchairs, patient lifts, and lift chairs for higher support needs
- Rollator walkers, knee scooters, and overbed tables for shorter-term recovery support
Every piece of equipment arrives sanitized, and delivery is same-day for most orders, which matters when a discharge date moves up unexpectedly. Rental terms are flexible rather than locked into long minimum periods, and setup, along with a walkthrough of how the device works, comes with delivery rather than as an extra step you have to chase down separately.
Author note: the one habit that catches most discharge mistakes
If there’s one habit that separates smooth discharges from chaotic ones, it’s this: test the actual route home before the equipment arrives. Measure the doorways, photograph the tight turns, and bring those numbers to whoever’s supplying the wheelchair or walker. A device that’s perfect on paper and useless in a narrow hallway is a failure you can prevent in five minutes with a tape measure.
The mistake I’d flag hardest is taking equipment home without a real hands-on demonstration first. A rushed nurse showing you a transfer once, from across the room, isn’t training. Insist on trying it yourself before you leave the building, and insist on getting the discharge instructions in writing. Verbal reassurance evaporates by the time you’re home and the patient needs to use the bathroom.
— Chandan
How to get the equipment you need today
Seventhchakra exists for exactly the moment this checklist describes: discharge is tomorrow, and you need a hospital bed, wheelchair, or scooter set up correctly, today, without a deposit tying up money you’d rather spend on care. No upfront deposit and same-day delivery across the Greater Vancouver area mean you’re not choosing between a rushed discharge and the right equipment.
Before you call, do the five-minute version of the mobility checklist above: measure your doorways, note any stairs, and check where the bed will actually sit in the room. That information lets the team recommend the right device the first time instead of swapping equipment mid-week. Every rental arrives sanitized and assembled, with a walkthrough of how it works included, and rental terms flex around how long recovery actually takes rather than locking you into a fixed contract. Start with the hospital bed rental page or the standard wheelchair rental page to see current setup, or browse the full rental catalogue to compare options and book same-day delivery.
Sources
The guidance in this checklist draws directly on Canadian public health sources, and it’s worth bookmarking them rather than relying on secondhand summaries.
FAQ
What are the 5 Ds of discharge?
The “5 Ds” refer to risks doctors watch for during hospital stays and discharge planning: death, disability, disease, discomfort, and dissatisfaction. It’s a clinical framework for evaluating whether a discharge is safe, not a consumer checklist, but it explains why hospitals push for a documented written discharge plan rather than a verbal summary.
What is a home care equipment list, and who fills it out?
A home care equipment list is the written inventory of devices and supplies a patient needs after leaving hospital, covering mobility, bathing, toileting, and any monitoring or medical devices. The discharge planner, patient, and caregiver should build it together before discharge day, and it should map directly to the daily tasks the patient needs to manage at home.
What should home health discharge instructions include?
Complete discharge instructions include activity and fall precautions, required equipment, a reconciled medication list, follow-up appointment details, and emergency contact numbers. HealthLink BC’s guidance treats all of these as mandatory written items, not optional extras a family can request later.
What are the typical steps in discharge planning?
Discharge planning generally moves through assessing the patient’s needs, arranging equipment and home care supports, reconciling medications, training the caregiver on transfers and device use, confirming follow-up appointments, and documenting emergency contacts. The exact number of formal steps varies by hospital and region, but every version centres on the same goal: nothing about equipment or training should be left to memory once the patient is home.
How quickly can I get a hospital bed or wheelchair delivered after discharge?
Same-day delivery is available for hospital beds, wheelchairs, and mobility scooters across the Greater Vancouver area, with setup included and no deposit required. Pricing and current availability for each device are listed on the rental page.
Recommended
- Hospital Equipment for Home Use in Vancouver: Complete Buying & Rental Guide (2026)
- Complete Guide to Home Medical Equipment in Vancouver: Rentals, Sales & What to Choose
- Where to Get Hospital Equipment for Home Use in Vancouver – Affordable & Trusted Providers
- Where to get Affordable & Trustable Medical Equipment for Home Use in Vancouver